US
US 


So, you’ve got your eye on Truvaga, or maybe it’s already on its way. Perhaps it has just arrived, and you’re eager to get started. Wherever you are on your wellness journey, this guide will walk you through everything you need to know to begin using your Truvaga device with confidence.
Learning how to use Truvaga is simple. Most people can complete their first session in just a few minutes. This guide covers how to set up your device, where to place it on your neck, how to choose the right stimulation intensity, how often to use it, and practical tips to help you build a consistent wellness routine.
Ready to experience greater calm, less stress, clearer thinking, and more restful sleep? Let’s get started.
Important: This guide is intended to help you get started with both Truvaga Plus and Truvaga 350. Please refer to your device’s user manual for complete operating instructions and safety information. Only Truvaga Plus utilizes and connects to the mobile app.
What Is Truvaga?
Truvaga is a handheld vagus nerve stimulation device designed to gently stimulate the vagus nerve through the neck using patented, clinically studied, and non-invasive technology. By supporting your body’s natural relaxation response, Truvaga can become an easy addition to your daily wellness routine.
Whether your goal is to unwind after a stressful day, support better sleep, improve focus, or simply feel calmer throughout the day, consistent use can help support your nervous system over time.
Introducing Truvaga’s Vagus Nerve Stimulators
Both Truvaga Plus and Truvaga 350 are designed to make vagus nerve stimulation simple, convenient, and easy to use wherever life takes you.
Both devices feature:
- Fast 2-minute sessions
- Portable handheld design
- Clinically studied cervical vagus nerve stimulation technology
- Drug-free, non-invasive wellness support
Both devices are designed to support:
- Stress relief
- Calm
- Better sleep
- Sharper focus
While this guide focuses on how to use your Truvaga device, you can also explore our articles on how the vagus nerve works and the science behind cervical vagus nerve stimulation if you’d like to learn more about the research supporting the technology.
Using Truvaga consistently and using it correctly can help you get the most from every session. The following steps will help you build a routine that fits naturally into your day.
How to Use Truvaga
Using Truvaga is easy:
- Set up your device and app (Truvaga Plus only)
- Locate the correct placement on your neck
- Start a 2-minute stimulation session
- Adjust the intensity to a level that feels strong but comfortable
- Repeat consistently as part of your daily wellness routine
The remainder of this guide walks through each step in detail.
Getting Started with Truvaga: Step-by-Step Guide
Once you have your Truvaga device, follow these simple steps to prepare for your first session.
Step 1: Set Up Your Device (Truvaga Plus Only)
If you’re using Truvaga Plus, begin by downloading the free Truvaga Plus App from the Apple App Store or Google Play Store.
The app allows you to:
- Control your device
- Start stimulation sessions
- Adjust stimulation intensity
- Save favorite session settings
- Create personalized routines
- Schedule reminders
- Track your usage and session history
Note: Truvaga 350 does not require the app. Simply continue to Step 2.
Step 2: Find the Correct Placement
Correct placement helps ensure your Truvaga device delivers stimulation to the area where the vagus nerve runs, allowing you to get the most from every session.
Before beginning your first session, locate the general area of your vagus nerve on either side of your neck.
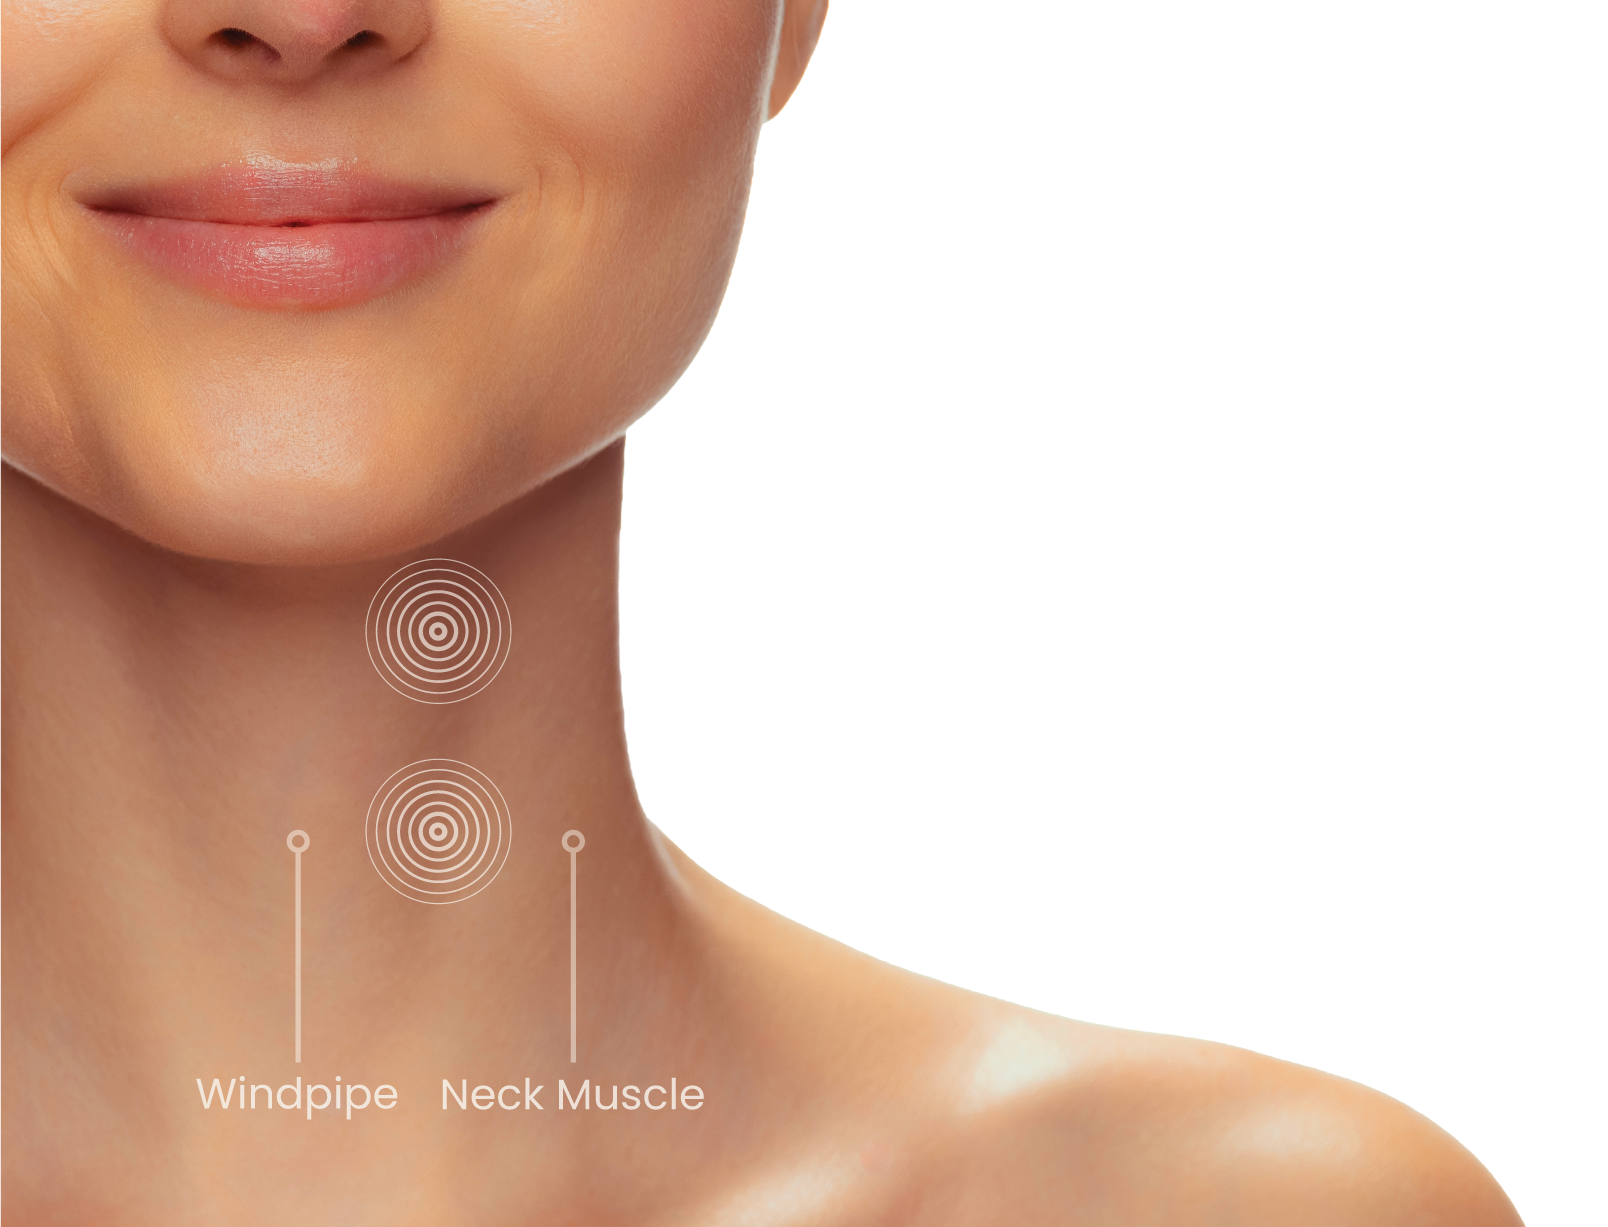
Your vagus nerve runs along both sides of your neck. Practice placing the device just below your jawline, over your pulse point, between your windpipe and the large neck muscle. You can gently feel for your pulse with two fingers to help identify the correct location.
Pro Tip: Imagine drawing an invisible line from the corner of your mouth straight down your neck. The recommended stimulation area generally falls along this line, making it a helpful guide when positioning your Truvaga device.
It may take a few attempts to find the placement that feels best, and that’s completely normal. Everyone’s anatomy is slightly different. Once you become familiar with the location, positioning your device will quickly become second nature.
Step 3: Prepare for Your First Session
Now that you’ve found the correct placement area, you’re ready to begin your first Truvaga session. Before you start, it’s important to ensure good contact between the device and your skin.
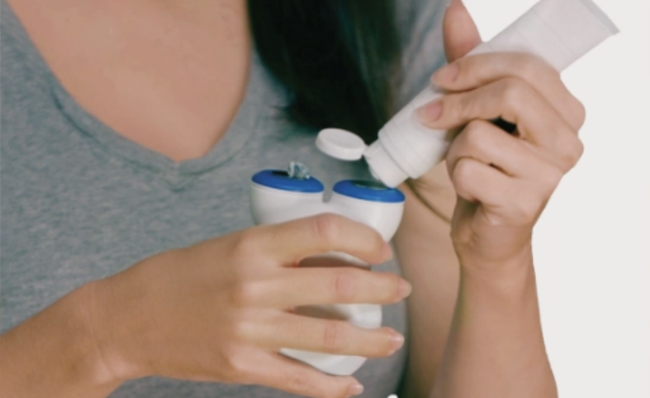
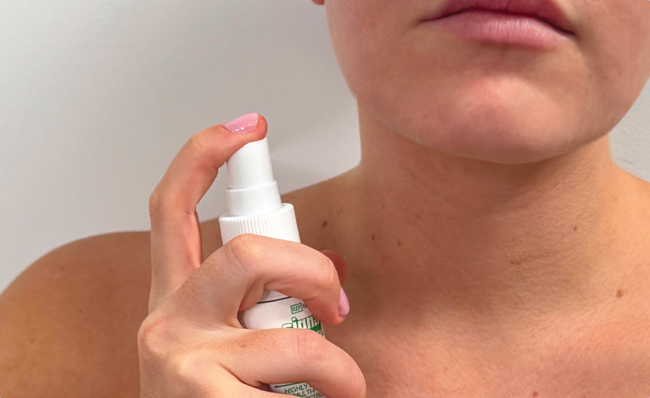
To do this, apply Truvaga’s conductive electrode solution or gel.
- Apply a pea-sized amount of electrode gel directly to the electrodes OR
- Apply 2–3 pumps of electrode spray directly to the skin on your neck.
Using enough conductive solution or gel is important for an effective and comfortable session. We recommend using only Truvaga’s conductive solution or gel, as other gels or sprays will not provide the same performance.
Note: Truvaga 350 includes electrode gel, while Truvaga Plus includes electrode spray. Both conductive mediums can be used with either device.
Step 4: Start Your Session
If you’re using Truvaga Plus, start your session and adjust stimulation intensity using the Truvaga Plus App.
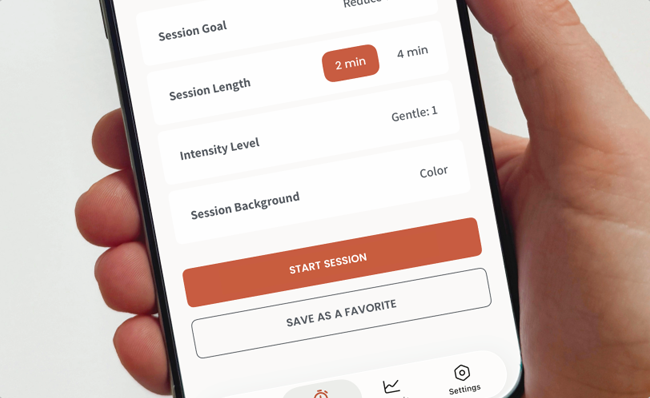
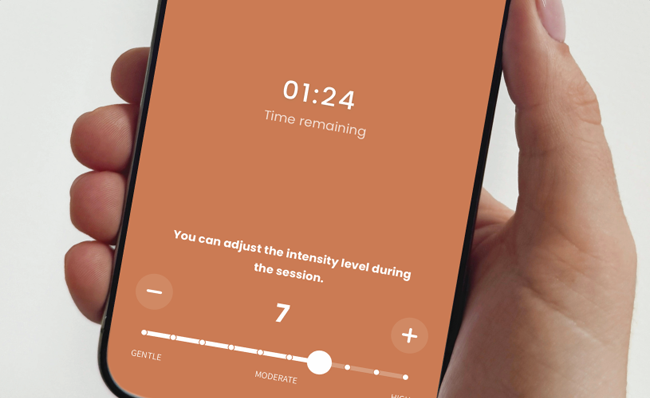
If you’re using Truvaga 350, use the buttons on the device to start your session and adjust the intensity.
Position the Device
Place your Truvaga device on the stimulation area you’ve already identified.
For the best results:
- Position the device vertically with one electrode directly above the other
- Ensure both electrodes remain in full contact with your skin
- Apply gentle to moderate pressure throughout the session
Adjust the Intensity
Slowly increase the stimulation intensity until it feels strong but comfortable.
Many users describe the sensation as a noticeable tingling feeling. Some people also notice a slight downward pull of the lip or gentle muscle movement during stimulation. This is normal, but not everyone experiences it.
There isn’t one “correct” intensity level. Choose the highest setting that feels comfortable for you. Your preferred intensity may change over time as you become more familiar with your device.
Fine-Tune Your Placement
If you don’t notice a comfortable tingling sensation, don’t worry. Small adjustments in placement can make a big difference.
Try:
- Repositioning the device slightly
- Applying a little more pressure
- Ensuring both electrodes maintain full contact
Some users also find that a slight tilt toward their windpipe provides better contact based on their individual anatomy.
Pro Tip: If the stimulation feels inconsistent, avoid making large movements. Instead, make small adjustments in placement or pressure until you find the position that feels most comfortable and consistent.
Below are some of the most common placement mistakes and simple ways to correct them.
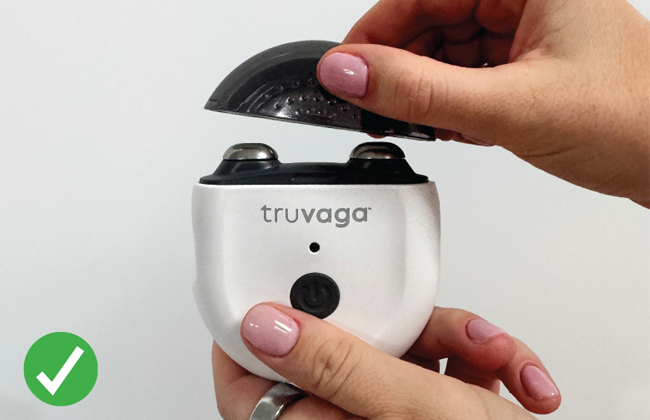
Remove Cap:
Be sure the protective cap is removed before starting your session. The electrodes must make direct contact with your skin.
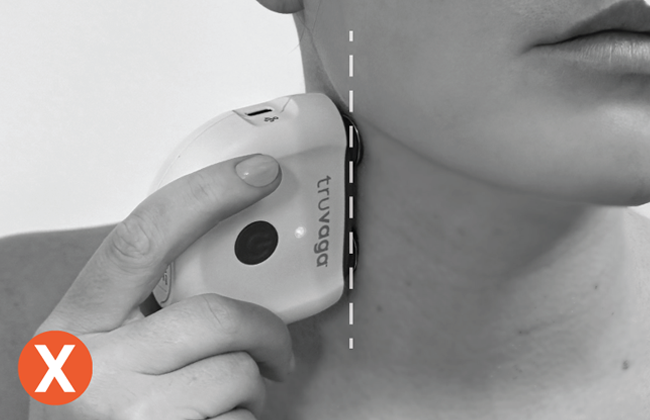
Move Device Forward:
If device is sitting under your ear or by the end of your jawbone, move it slightly forward toward the front of your neck.
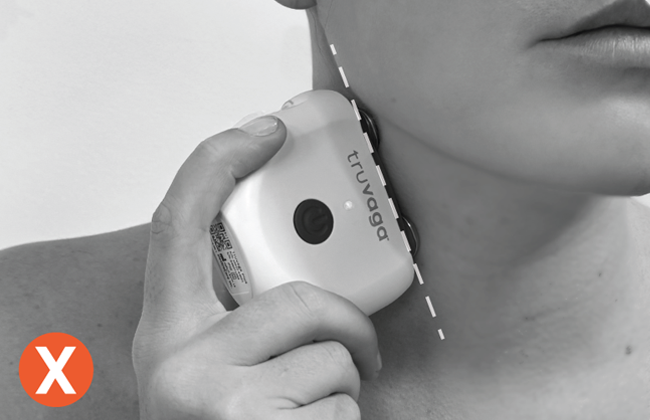
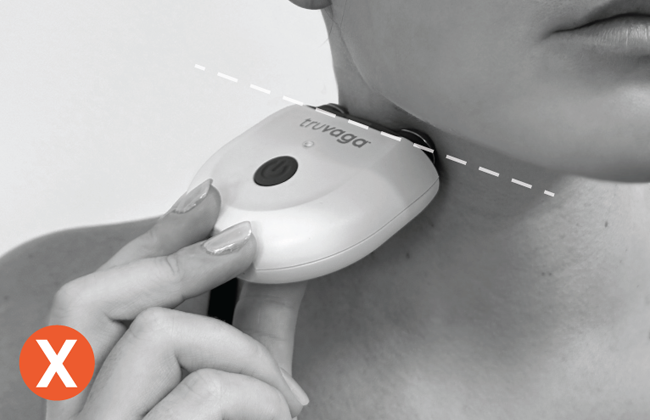
Tilt Toward Your Lip:
The device should be held vertically, with the electrodes stacked one above the other. Both electrodes should maintain continuous contact with your skin during use.
Place Vertically:
The device should be held vertically, with the electrodes stacked one above the other. Both electrodes should maintain continuous contact with your skin during use.
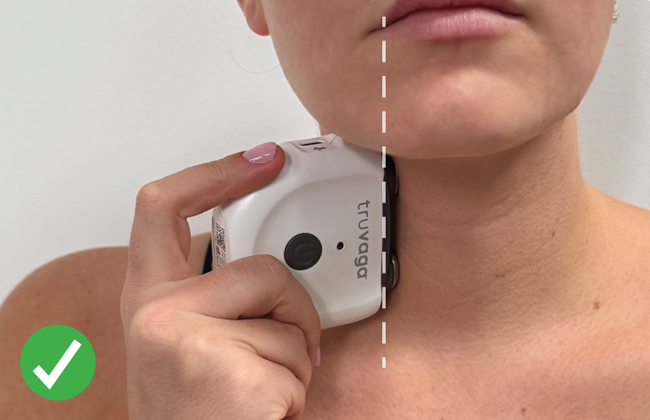
PRO TIP: Imagine drawing an invisible line from the corner of your lip straight down your neck. Placement should fall within this area.
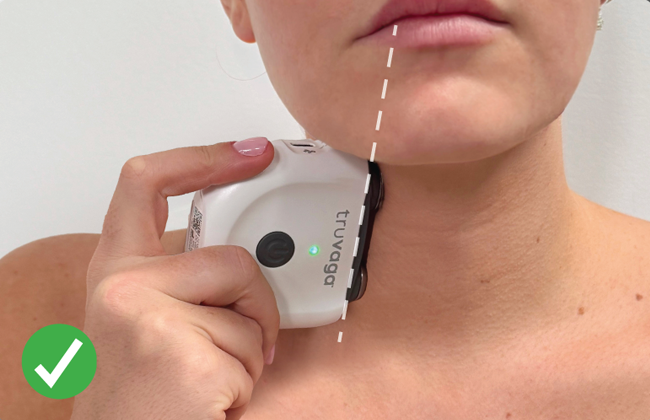
PRO TIP: A slight tilt toward your lip or windpipe is fine. If you’re not feeling anything, move farther away from the ear.
Step 5: Your Session Is Complete
When your Truvaga device beeps twice, your session is complete. After each session:
- Wipe any remaining conductive solution or gel from your neck.
- Clean the electrodes and device casing with a soft, dry cloth.
- Replace the protective cap(s).
Avoid using soap, alcohol, or household cleaning products, as they may damage your device. Your Truvaga is now ready for your next session.
Pro Tip: Consistency is one of the best ways to get the most from your Truvaga experience.
If you’re using Truvaga Plus, you can:
- Schedule session reminders
- Save favorite intensity settings
- Create personalized routines
- Track your session history
These features can help make Truvaga part of your daily wellness routine.
How Often Should You Use Truvaga?
For best results, we recommend using Truvaga twice daily as part of your regular wellness routine.
Many people choose to use Truvaga:
- In the morning to start the day feeling calm and focused
- In the evening to unwind before bed
- Before a stressful situation
- After a mentally or physically demanding day
Consistency matters more than perfection. Try using Truvaga at the same times each day, so it becomes a natural part of your routine.
Need Help Using Truvaga?
If you would like personalized guidance, you can schedule a complimentary 15-minute training session with a member of our Customer Support team.
A training session can be especially helpful if you have questions about:
- Finding the correct placement
- Choosing a comfortable intensity
- Improving electrode contact
- Building a consistent routine
You can also explore additional support materials for both Truvaga Plus and Truvaga 350, including:
- User manuals
- Quick-start guides
- Getting-started videos
- Frequently asked questions
Frequently Asked Questions
How long does a Truvaga session take?
A Truvaga session takes 2 to 4 minutes, depending on the device and session type. Both Truvaga Plus and Truvaga 350 are designed for fast, focused sessions that fit easily into a morning or evening routine. Your device will beep twice when the session is complete.
What does Truvaga feel like during a session?
Most people feel a gentle tingling sensation at the stimulation site. Some also notice a slight downward pull of the lip or subtle muscle movement; this is normal, but not everyone experiences it. Sessions should always feel strong but comfortable, never painful.
What intensity level should I use?
There isn’t one “correct” intensity for everyone. Slowly increase the stimulation until it feels strong but comfortable, and choose the highest level you can comfortably tolerate. Your preferred intensity may change over time as you get used to the device.
What if I can’t feel the stimulation?
This usually comes down to conductive solution/gel or contact. Make sure you’ve applied enough gel or spray and that both electrodes are in full contact with your skin. Small adjustments, like repositioning slightly, adding more pressure, or a slight tilt toward the windpipe, often solve the problem better than large movements.
Can I use the electrode gel and electrode spray interchangeably?
Yes. Truvaga 350 comes with electrode gel and Truvaga Plus comes with electrode spray, but both conductive mediums work with either device. Use whichever you have on hand, just apply enough for full electrode contact.
Do I need the app to use Truvaga?
Only if you have Truvaga Plus. It connects to the free Truvaga Plus App, which lets you control sessions, adjust intensity, save favorite settings, and track usage. Truvaga 350 is fully app-free. You just use the buttons on the device.
Author bio: